pageflight

joined 2 years ago
[–] pageflight@lemmy.world 2 points 2 days ago

The clamping approach worked great!

[–] pageflight@lemmy.world 2 points 5 days ago (2 children)

The other side still has the bolt with the slotted head. I can turn it, but the nut and bolt just spin together.


Most of the nuts came out with minimal force, but the last one just spins in place. I tried rubber gloves, painter's tape, and duct tape to get a better grip. I'd rather not cut a slot in the domed nut if there's another good strategy.

The rest of the restoration underway:

[–] pageflight@lemmy.world 2 points 1 week ago

I'll definitely post a follow up!

[–] pageflight@lemmy.world 4 points 1 week ago

Thanks, I'm hoping I can get at least one good one from the lot.

[–] pageflight@lemmy.world 11 points 1 week ago (1 children)

That sounds like roughly what I saw in a video, but this is my first attempt so I'll see how it goes.


$15 at an estate sale, I was definitely prepared to pay more. I've seen people finding such cool stuff at secondhand shops and had no luck myself, so I'm hoping I can get some life out of these.

Also got a plane (one of the adjustments doesn't work but otherwise looks decent) and a Heath Kit power supply.


I found this table on the curb a while back, less the leg hardware. No a relative could use it, and I'm wondering how to fix it up.

Cut a couple 2x4 sections to fill the truncated-triangular area and screw through them into all surfaces?

The legs have a hollow center drilled out, at the top, so I assume some metal piece with threaded holes fit there, and a metal plate anchored that to the skirt (?).

Another view:


The third step, burnishing the edge, at a slight angle towards the face “turns the burr upwards”. The SEM clearly shows a blade-like bevel has been formed, perpendicular to the card face. However, rather than simply turning the burr, metal has been reformed, and the burr has buckled rather than rotating. Additionally, the burnishing rod has honed the side of the bevel, removing metal just as a honing rod removes metal to restore a knife edge.

I've been struggling to sharpen my card scraper, and was happily surprised to see that scienceofsharp.com has an article (from 2019) that helps visualize the burr structure.


I haven't gotten around to making a nice board with slots for each hone, and for some reason this setup wasn't obvious to me so I thought I'd share. Front is against a bench dog, back is pressed against the rubber foot of the edge of the bench. It is easy to swap in the different hones, and doesn't scoot around.

(Still figuring out how to put a burr on that card scraper though.)


Similar to the one I made in oak, the other piece of hardwood board I had for this project was ash.

detail view

The jig was a bit cobbled together, which mostly worked fine for doing 2 of them. The 1-inch spacer did slip, which is where the divot I was filling with sawdust came from. Doing any more of them I'd definitely want a more thought-out jig (or CNC).

jig

Back

I initially had a lot of burning on test pieces. Turned out my router bit just got dull a lot faster than I expected, and after sharpening on a DMT it cut fine without any special care to speed.

test cuts

I put butcher block conditioner on it, though I didn't know if that's enough to protect it from dirty pans.


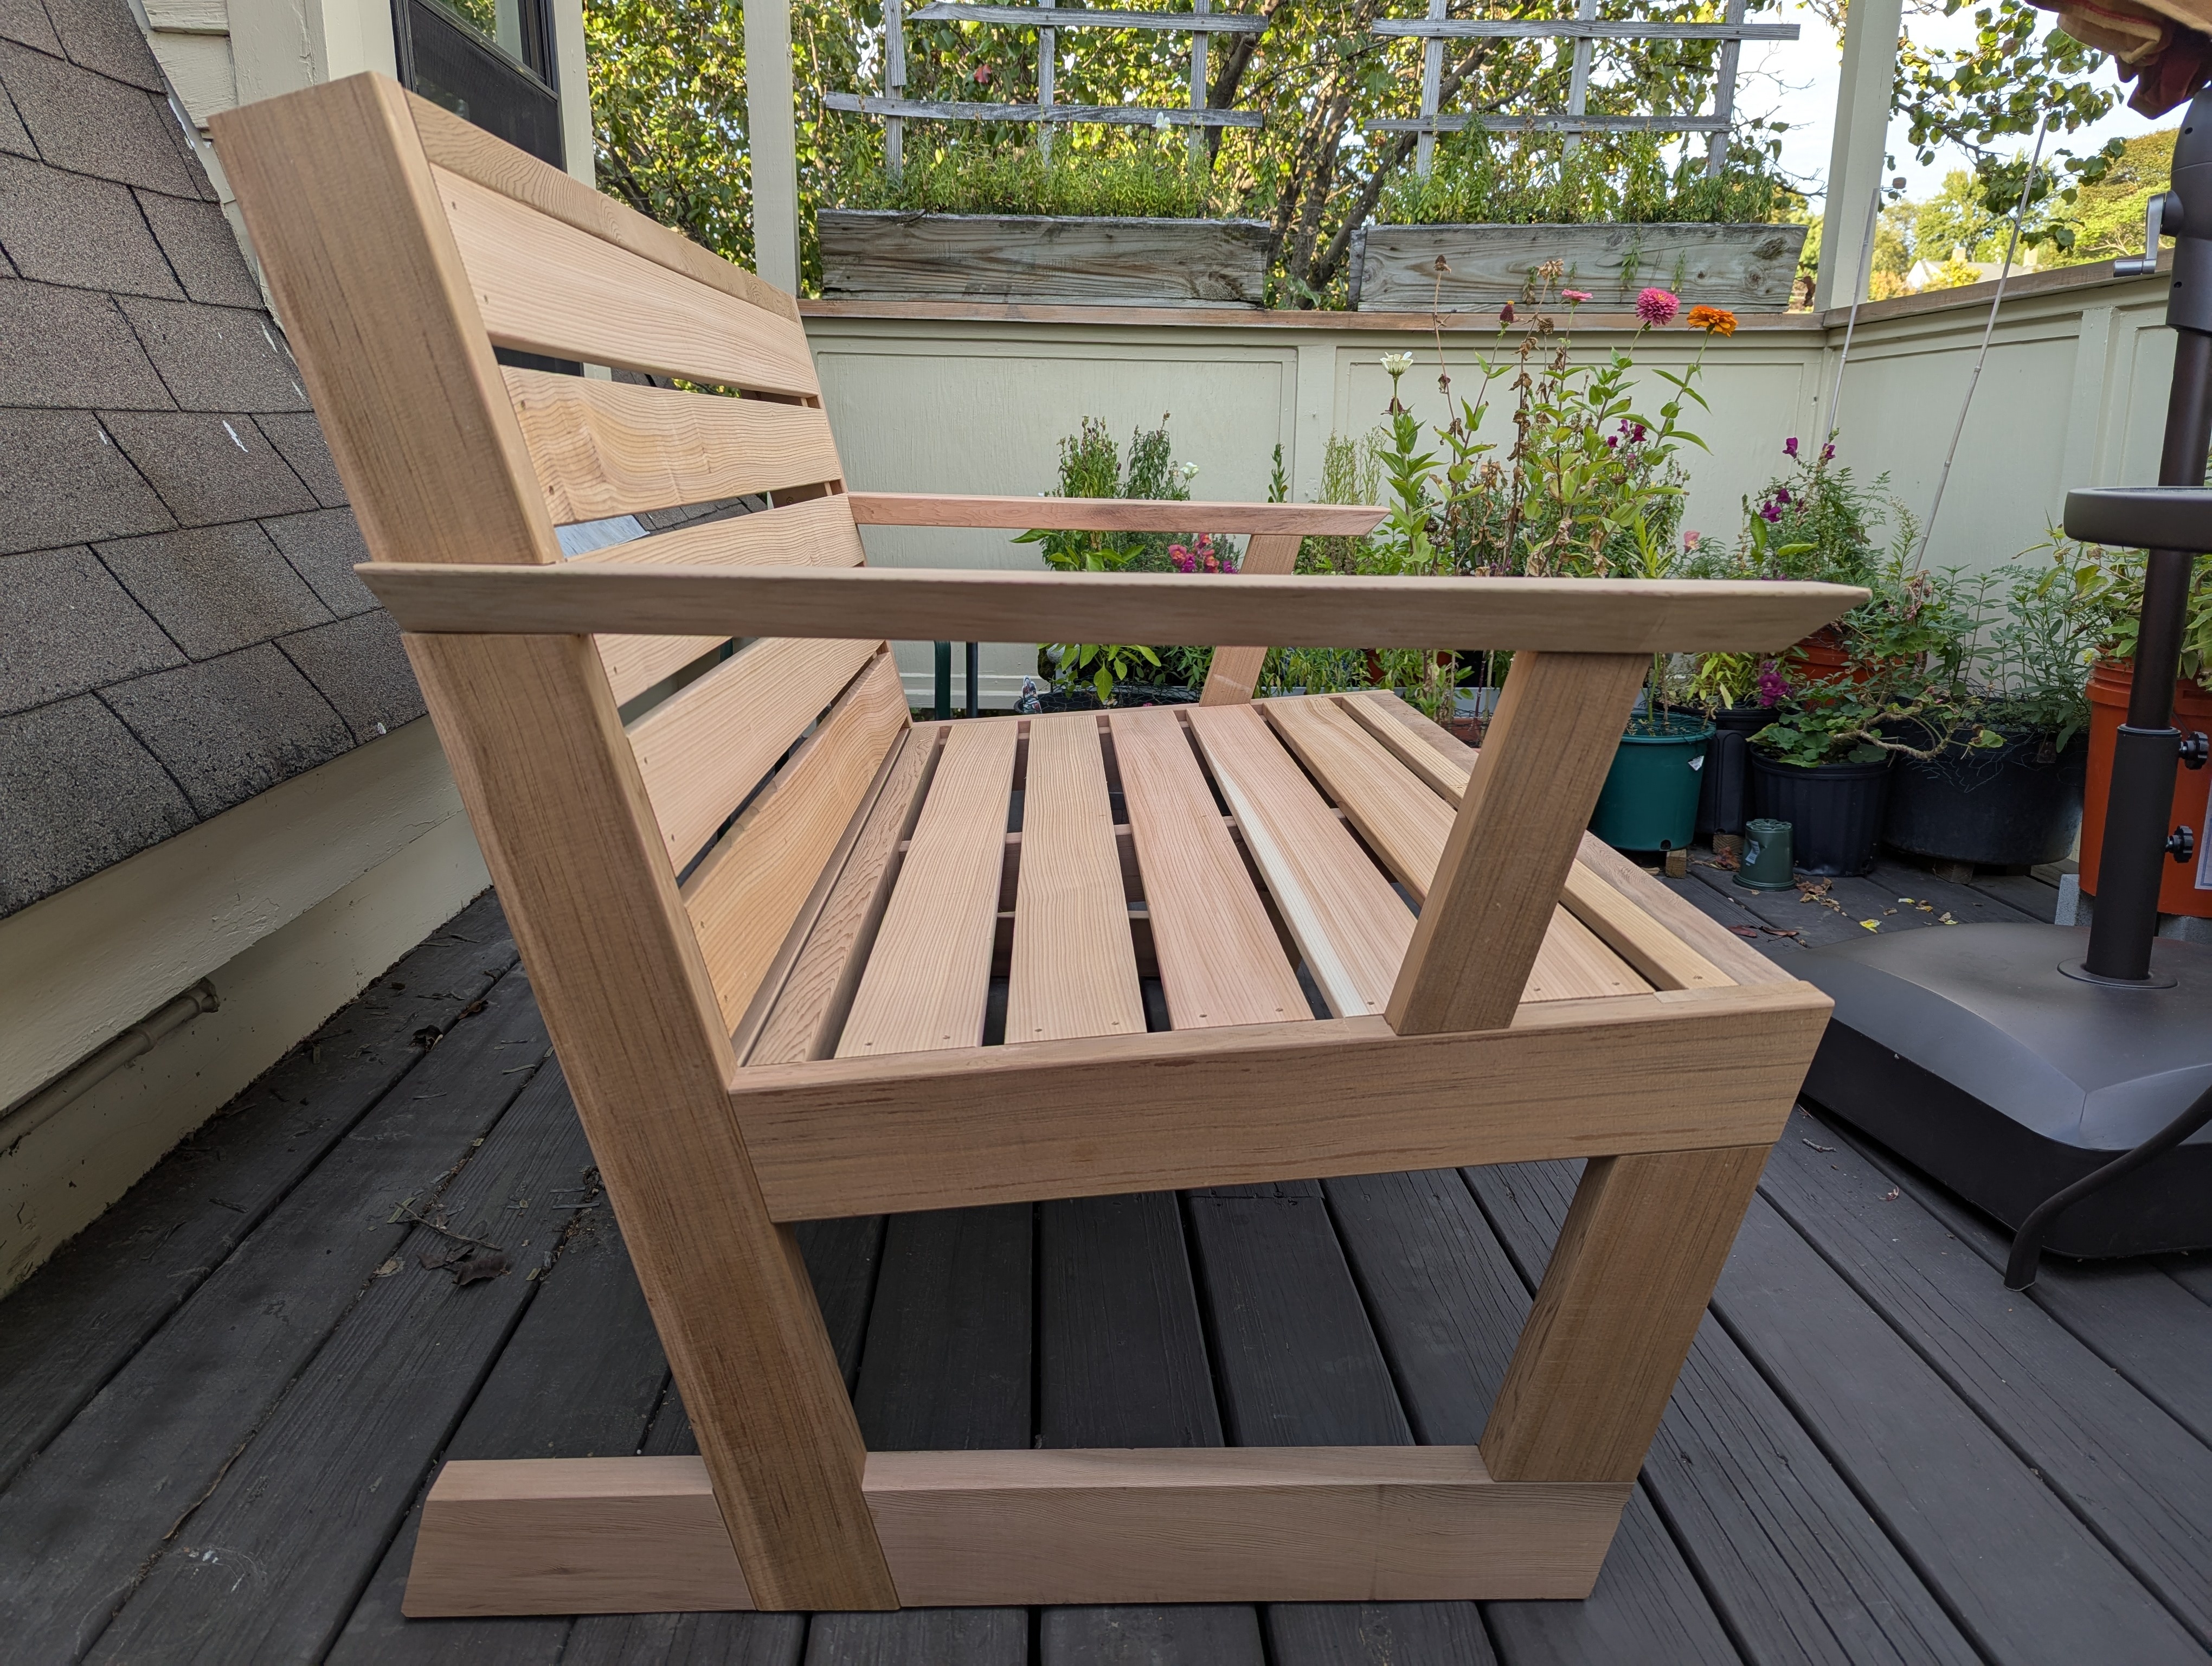
Outdoor sofa to replace our falling-apart fake-plastic-wicker one, reusing the same cushions.

sofa with cushions

It's roughly following Wilker Do's Outdoor Sofa plans, however I adjusted the size, changed from a two-layer construction to lap joints / mortise-and-tenon joints, and filled in some missing details.

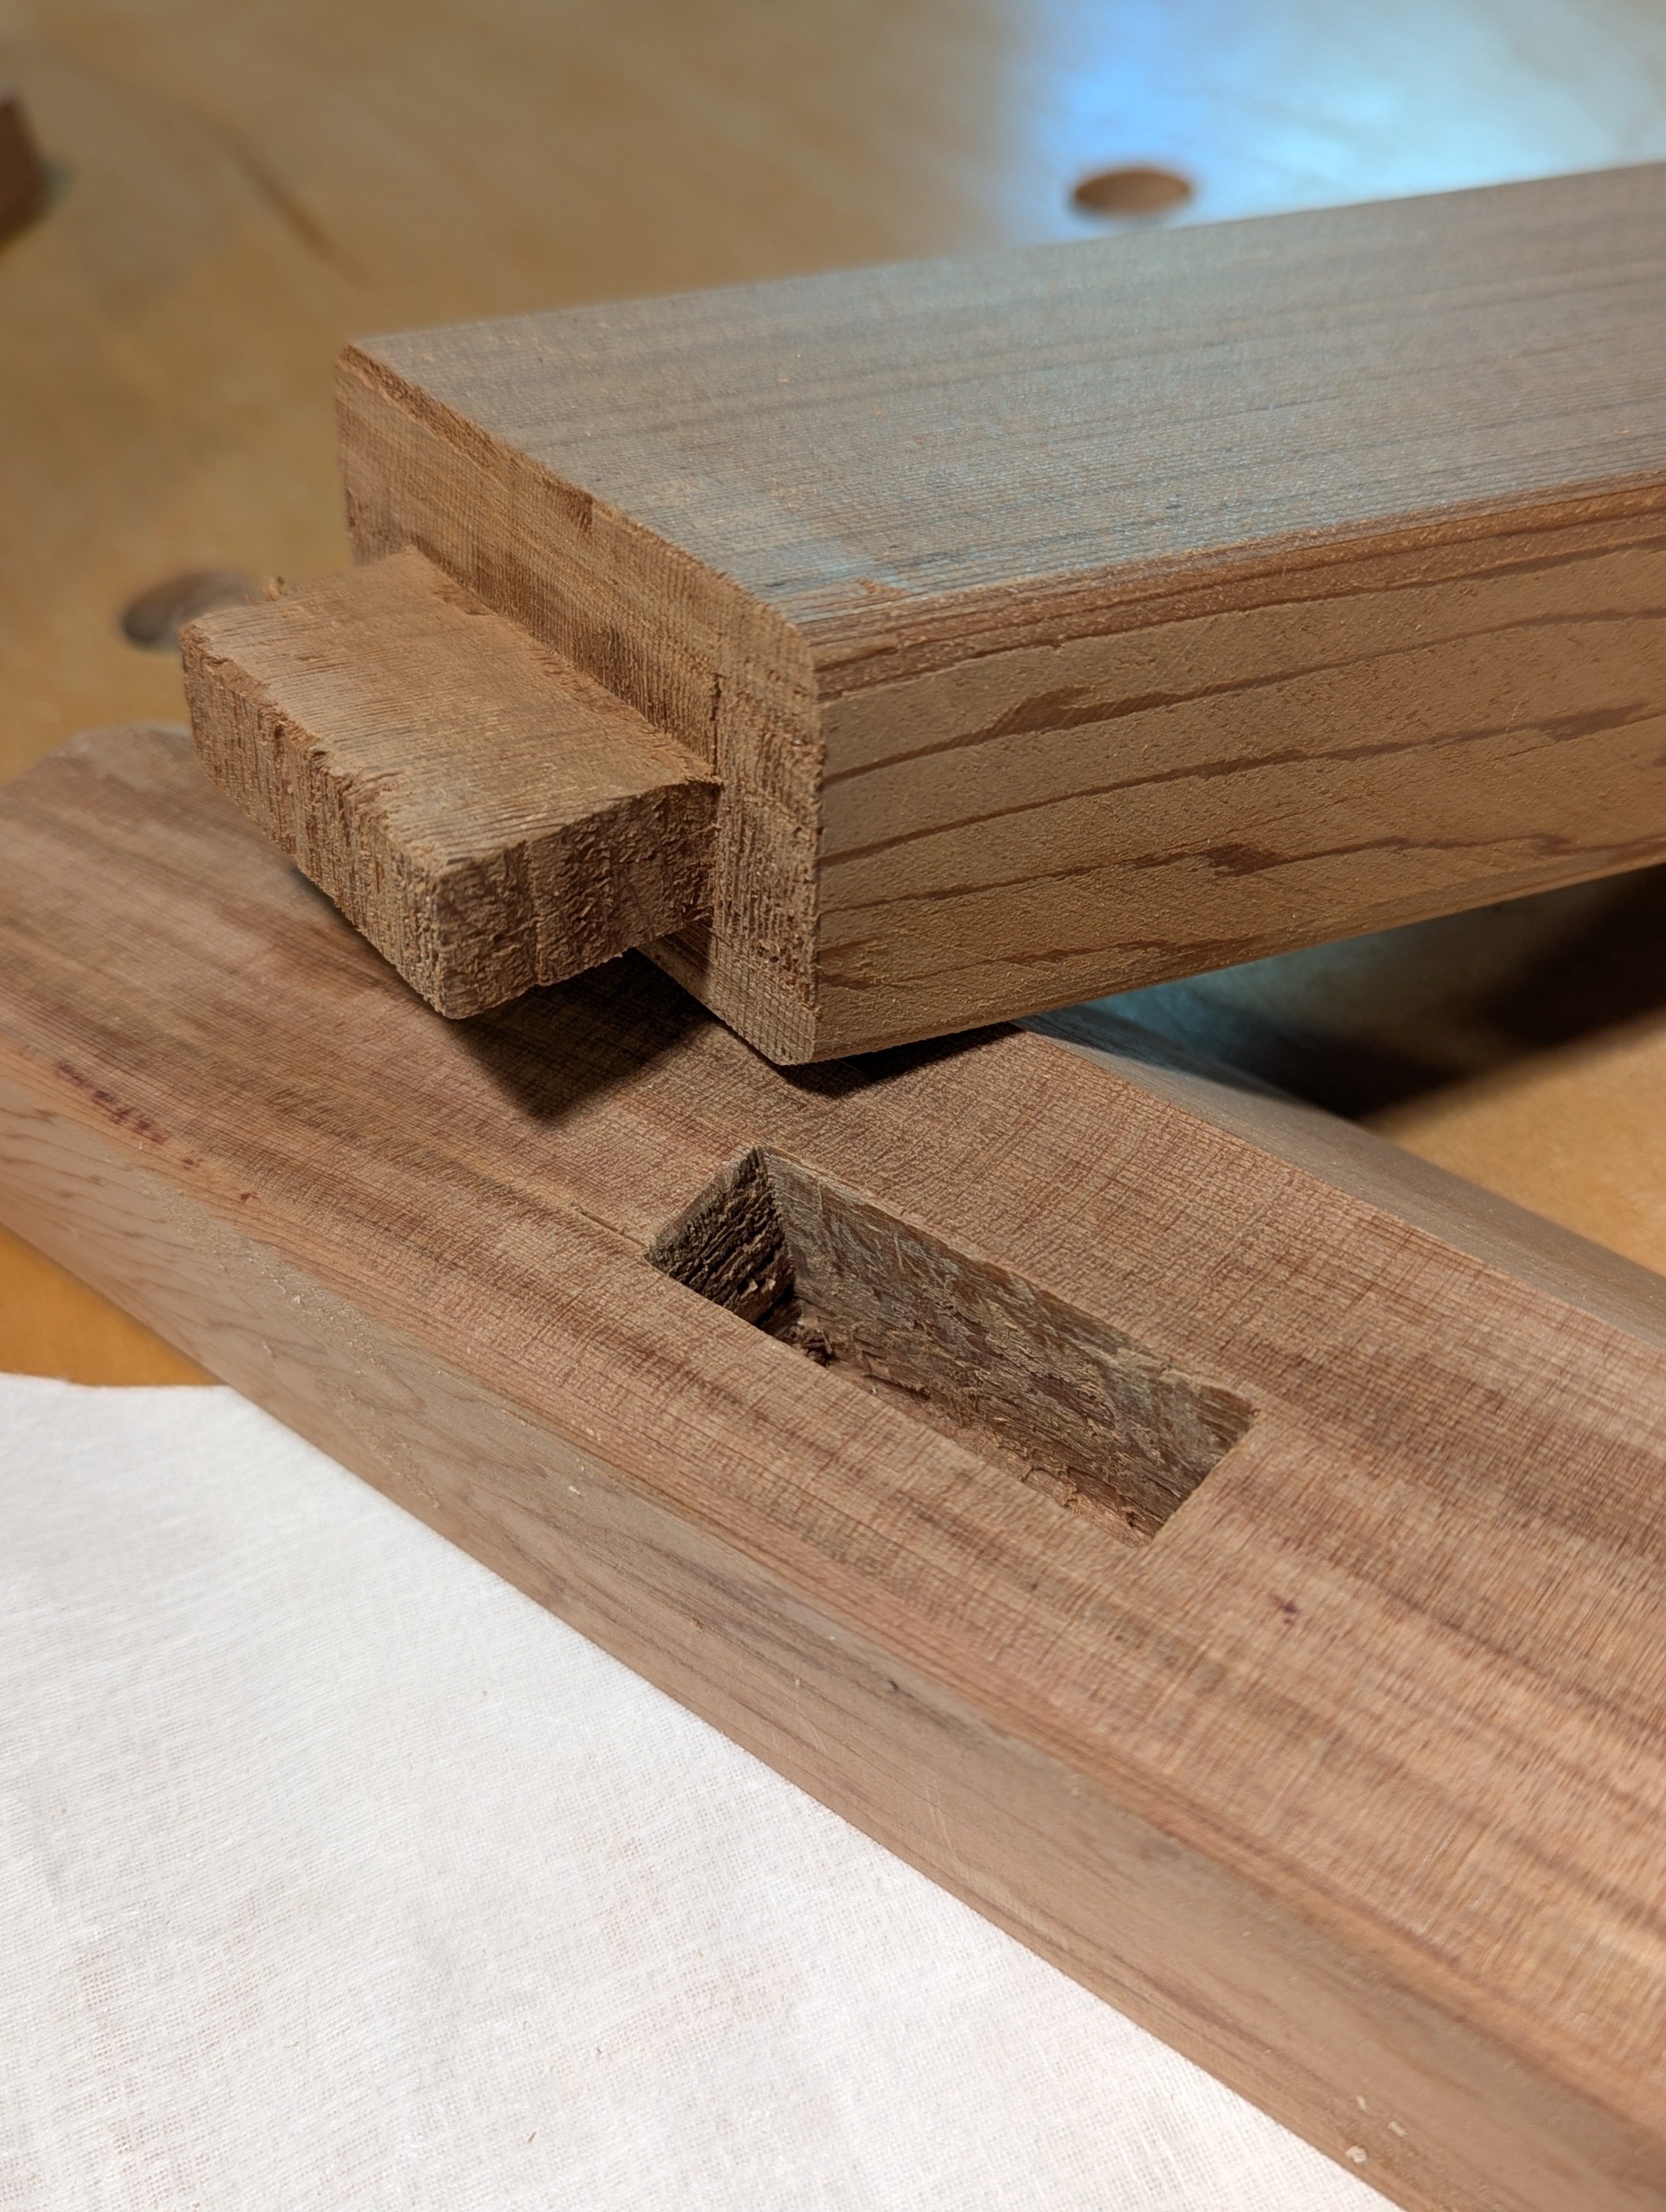
First time hand-cutting mortise and tenons, for the arm rest supports:

mortise and tenon

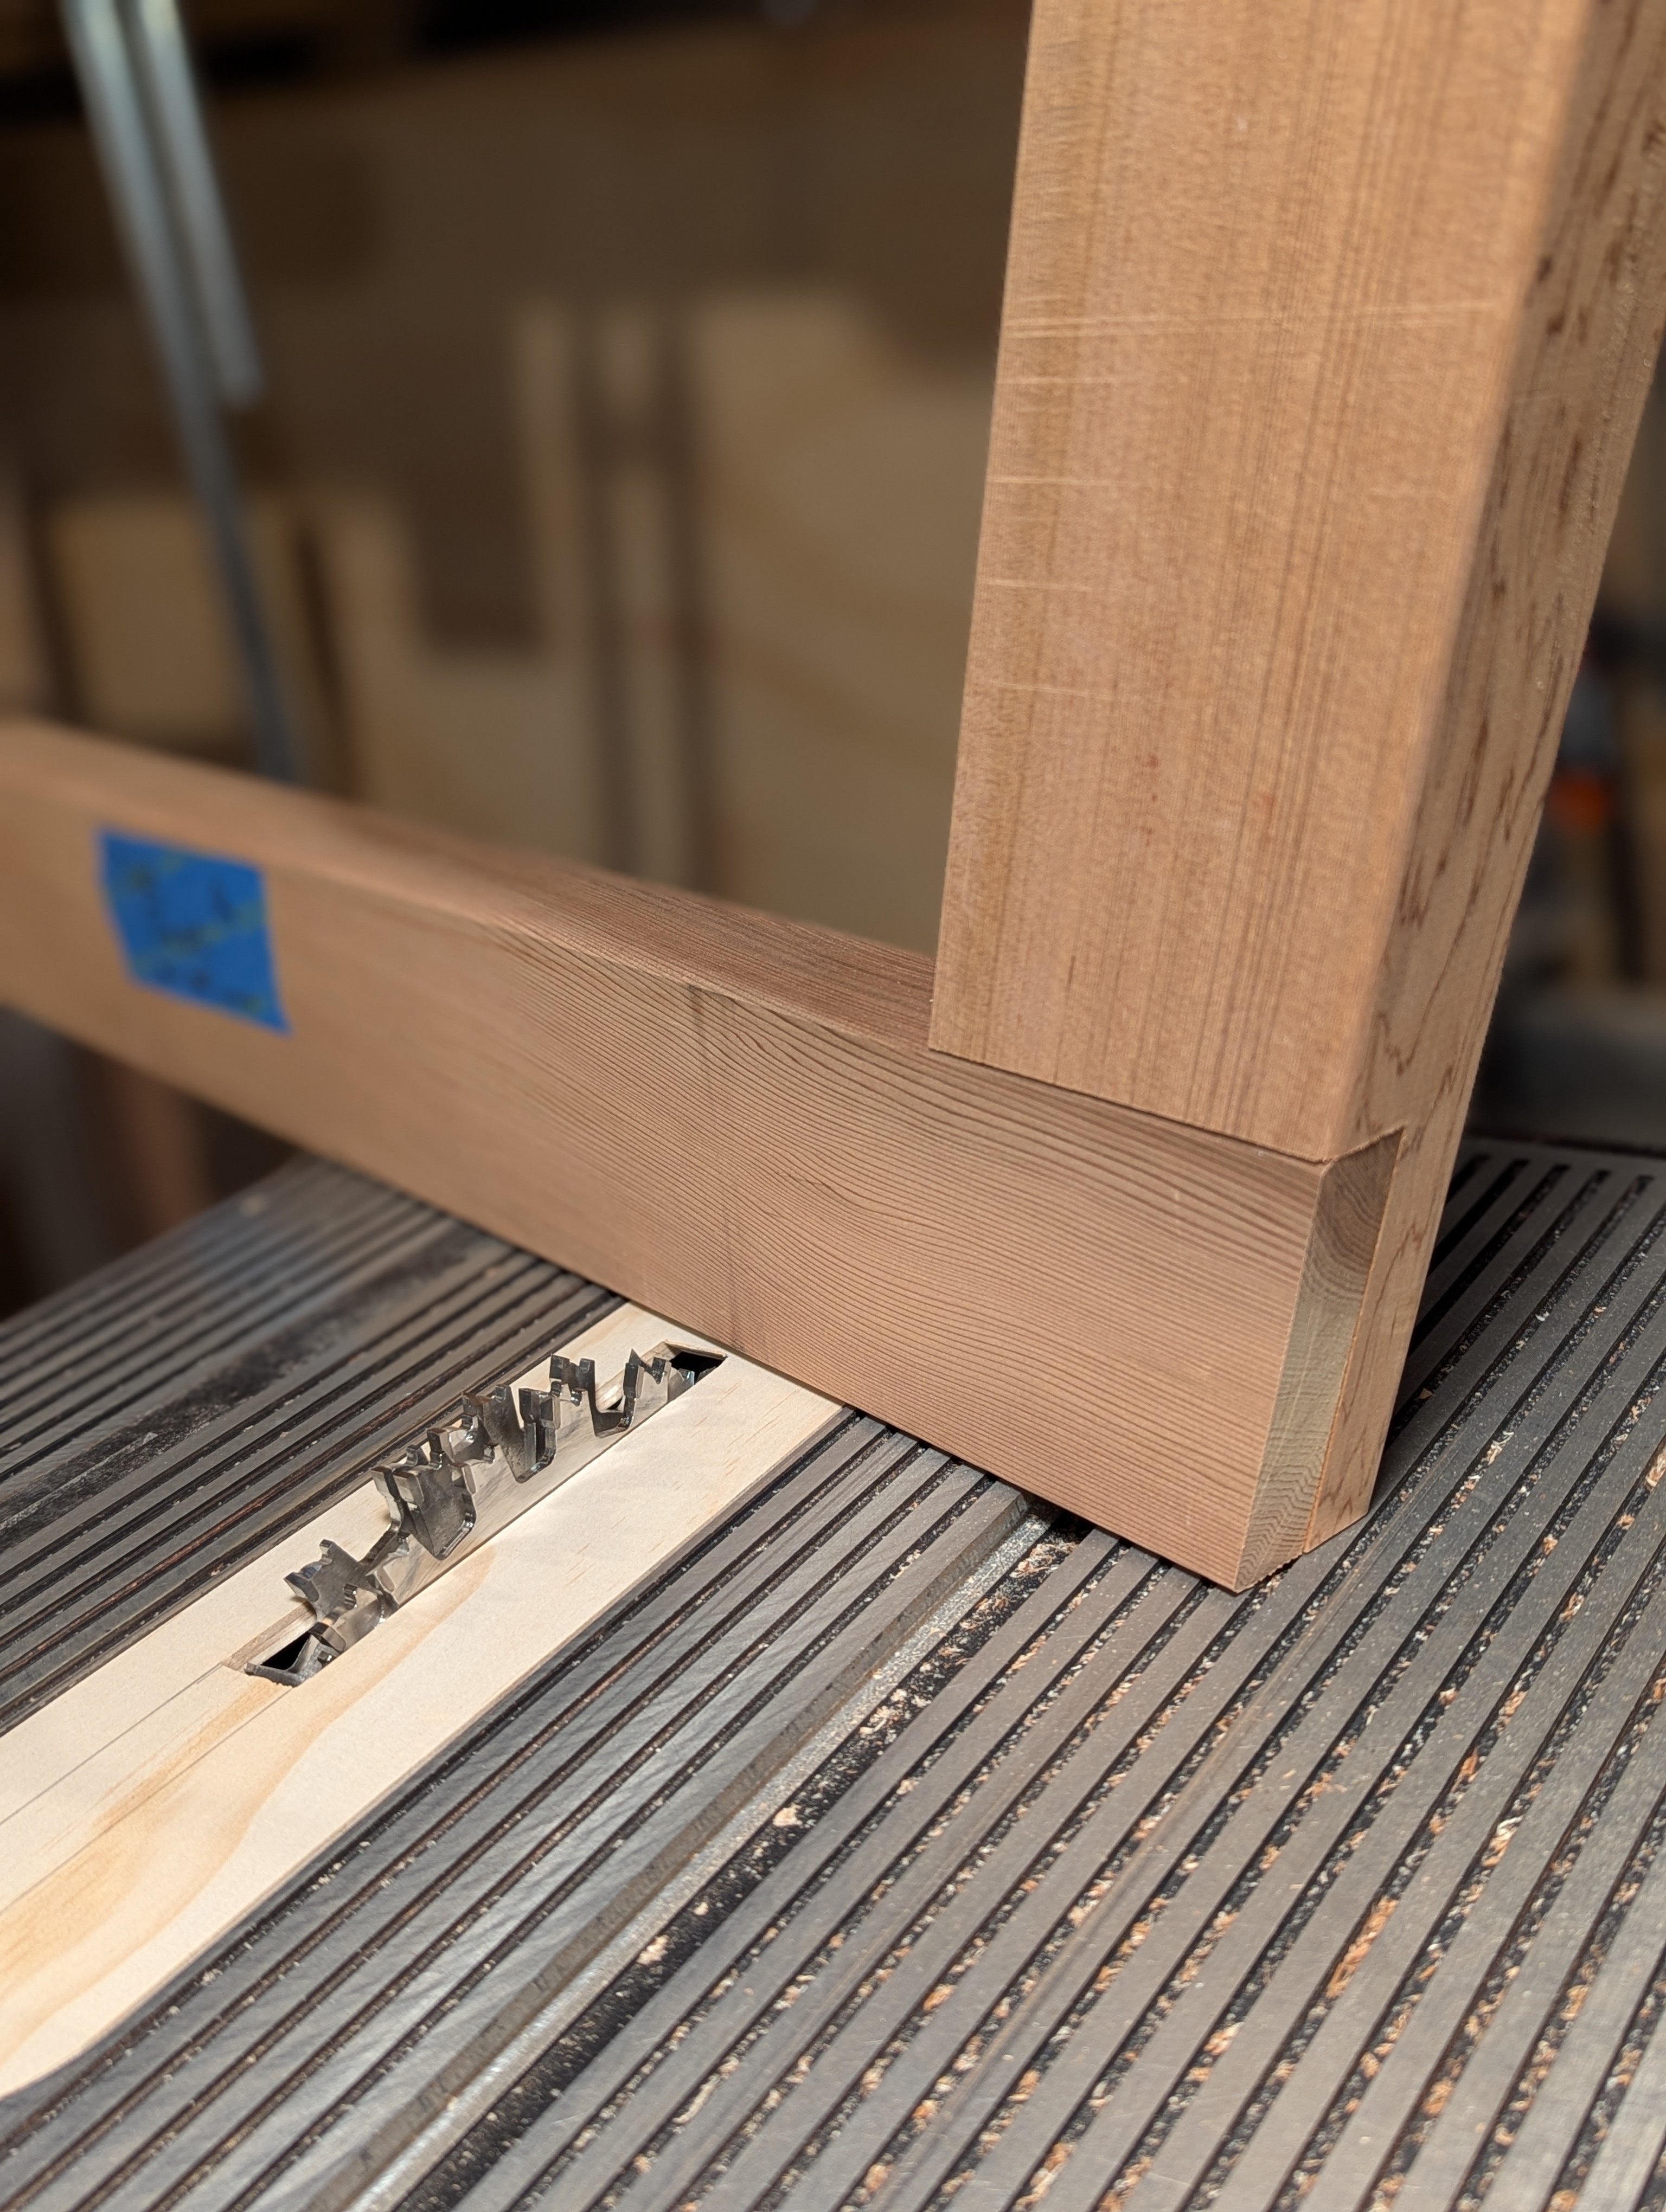
First time making half-lap joints, for the side frames; very happy with my new Infinity Tools Dadonator:

dado blade

half lap joints

After some attempts at CAD, I ended up just cutting out scale paper parts and then measuring angles/lengths to fit them together. It mostly worked, but some lengths didn't work out in wood.

plans

I used western red cedar for rot resistance, since this will sit unsheltered. I haven't finished it yet, I'm considering poly, boiled linseed, or Thompson's water seal (glad for recommendations). First time working with cedar, it's very soft and scratch prone, smells great, and is noticeably lighter than pine. Also pricey; one thing I didn't like about this design is it is fairly overbuilt.
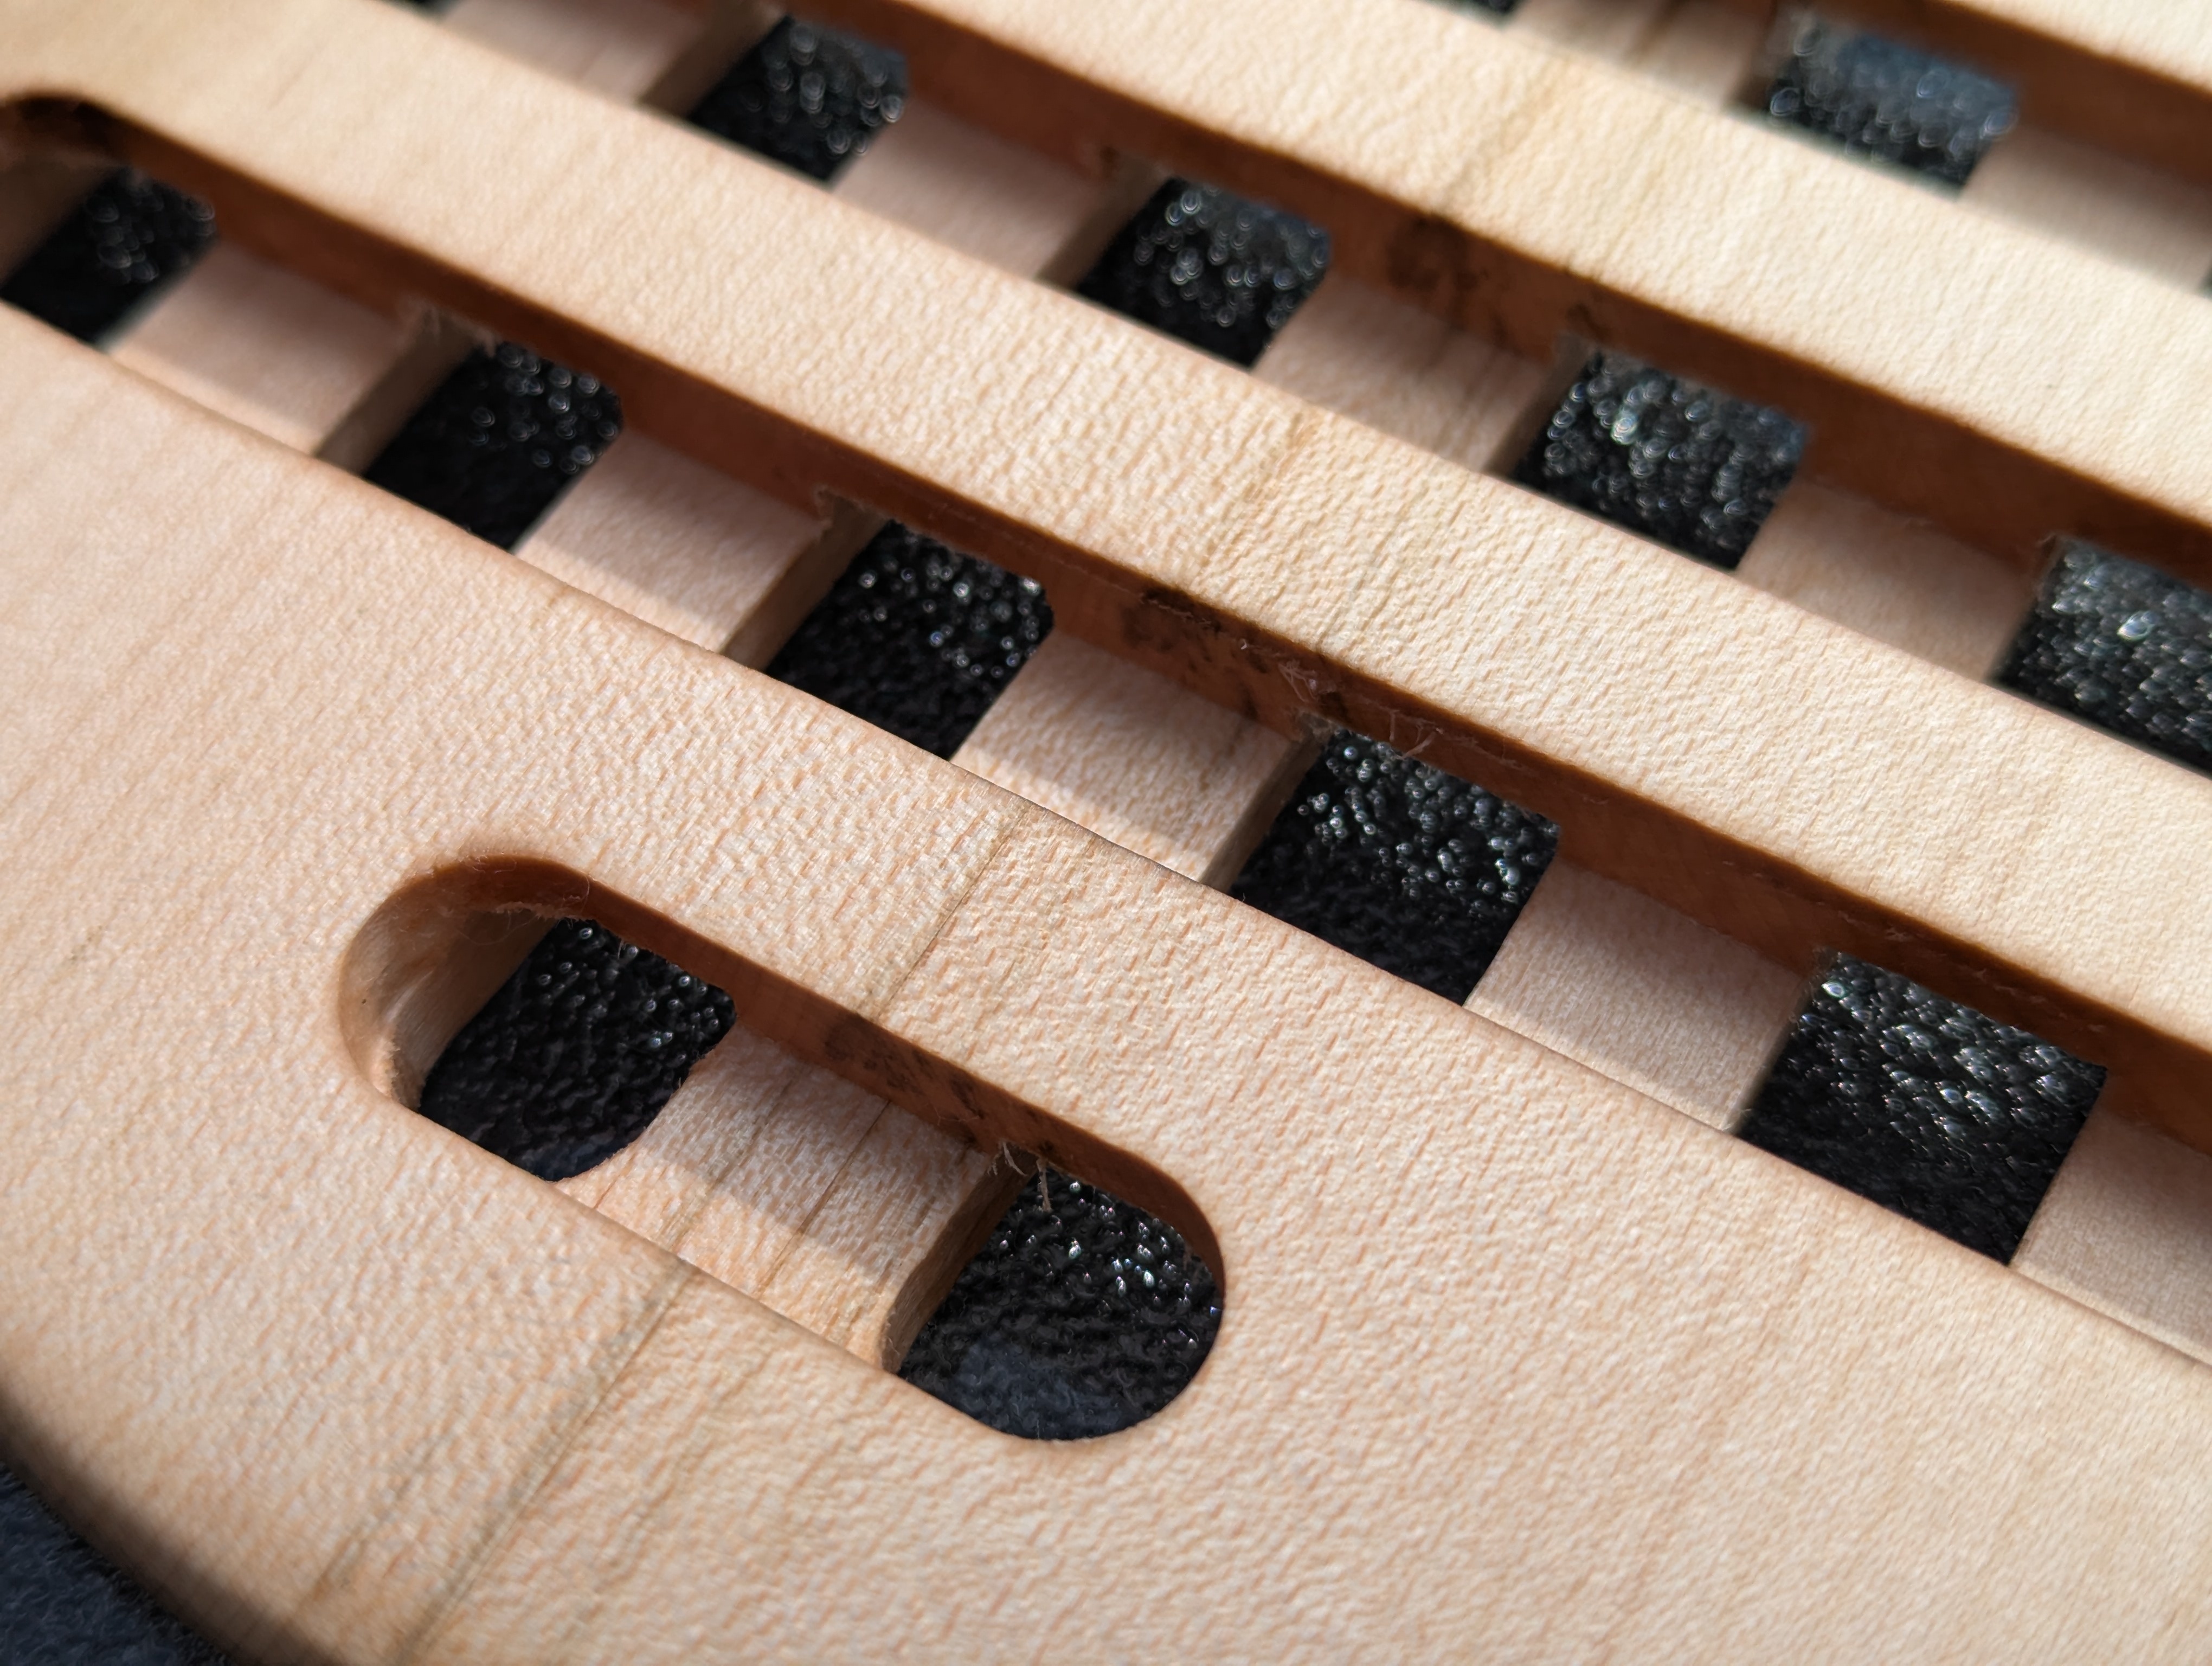
side view

top view


It has seen some water damage and the varnish is flaking off (especially on the top). But I don't necessarily have the time/energy for a full strip/sand/refinish, especially as this may get dinged up; I'm just looking for a reasonably pleasing look.

Looking at the bare wood that was between assembled pieces, it looks like the piece was stained and then varnished. What's a good way to get the old flaking varnish off without messing up the stain -- Citristip, just sanding? Thinking I'll just put some coats of new polyeurethane varnish on as the new finish. Most instructions I see online are for a really thorough refinishing, so I'm wondering if there's some middle ground that will clean up the worst of the water damage and protect the wood, even if it doesn't look like new.

Closer view of the top: